Handmade Handmaids: A Tutorial
When I saw the protesters in Texas dressed like Handmaids protesting restrictive abortion laws, I knew I had a new life goal.
I mean, think about it. This protest marries literally every single one of my interests. Books. Feminism. Protesting. Politics. Sticking it to the man. Theatrics. Crafts (because CLEARLY I would make my own Handmaid costume).
So, duh. I had to do it, right? There was only one problem… I live in the great blue state of Illinois. All that stuff about calling your reps to voice discontent and stuff? I hardly ever get the chance. Give or take, every single politician that represents me is a Democrat. We also have some of the best healthcare laws for women in the Midwest.
But I was getting jealous. These Handmaids kept popping up all over the place. Ohio. DC. They even greeted Donald Trump IN POLAND, which is so badass I can’t even believe it.
When, oh when, was it going to be my turn? Would I have to go to another state to participate? Because I would. I soooooo would.
And then it happened. Remember how I just extolled Illinois’ cool-hued virtues? Well, that’s true with one (kind of important?) exception – our Governor is a Republican. Don’t ask me how this happened. It certainly wasn’t because of me, who hauled her 9-months-pregnant ass to the polls the day before her due date to vote for the other guy.
Side note: Rauner, our governor, is not only a Republican; he is a business man-turned-politician who had zero political experience before he took office. Shortly afterwards, Illinois went almost three years without a budget, is now in some of the worst debt it’s ever been in, and he’s hiring reporters from Breitbart to manage his next campaign. This might explain why Illinois was a beacon of blue amongst a bunch of midwestern red in this past presidential election because, you know, we LEARNED OUR LESSON.
But as far as women’s rights went, Rauner wasn’t supposed to be that bad. He was pro-choice! I could work with that…?
Until he started playing party politics. You’d think he’d wise up since he’s up for reelection shortly and Illinois almost always landslides for the Democrats but, you know, his choice.
Enter HB 40: A bill that deals with healthcare, but the sticking point here is that it ensures that women will have access to abortion in Illinois if Roe v. Wade is overturned.
It made it through the House. It made it through the Senate.
And, you guessed it, Rauner says he is going to veto it.
So, on Monday, I saw an event on Facebook. A group of women, dressed as Handmaids, were going to go to the Thompson Center in Chicago – Rauner’s Chicago office building – and protest.
This. Was. My. Chance.
The group was already formed, but I took a shot, emailed the organizer, asked if I could sew my own robe and join, and she said: “Absolutely!” And then, I asked if my friend, Julia, could join too. And she said: “The more the merrier!”
YES.
So, I set out to find tutorials for making a Handmaid costume and was literally shocked to find that there weren’t really very many out there.
Something as silly as that isn’t going to stop me, though! And now it won’t stop you, either, because you’ll have this comprehensive (and quick!) tutorial to be your guide. Praise be!
(Let’s see how many Handmaid’s Tale jokes I can make in this tutorial, shall we?)
Supplies:
- Red fabric
- White fabric
- Coordinating thread
- Red ribbon
- White ribbon
- Sticky-back velcro
- White poster board/foam board/vinyl board
- Sewing machine
- Sewing notions (scissors, pins, measuring tape, fabric maker, etc.)
- Optional: serger, interfacing, a pre-made white bonnet
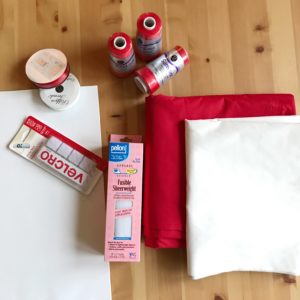
For this tutorial, you will need at least a basic knowledge of sewing, and it really helps if you have a serger. I needed to make five robes in one day, so I cut a lot of corners. I’m going to show you how to make these the quick-and-dirty way, but if you are an expert seamstress, you may want to add some fancy finishes to really up the ante. I know how to do these things, but I was also comfortable with the fact that these would probably get worn once and no one was going to be close enough to see how janky they were. Done is better than perfect, and blessed be the fruit… of my labors.
I was also comfortable making these on the cheap. I bought this red broadcloth from Joann’s for $3/yard. Broadcloth gets a bad rap, and for good reason: It looks like crap and should really only ever be used for something low-stakes like this. You get what you pay for.
First, you need to figure out how much fabric you need. Take your measuring tape and measure from your shoulder to your ankle. You don’t want to trip over this thing and become some kind of internet meme, so you don’t want it dragging on the ground. Then, multiply that measurement by 2. Convert it into yards, add a half yard, and that’s how much fabric you need.
We’re just handmaids, so we can’t do a lot of math, right? So here’s my example:
-55 inches from shoulder to ankle. 55 x 2 = 110
-110 divided by 12 (inches) = 9.16 (feet)
-9.16 divided by 3 (feet) = 3.05 (yards) + 1/2 yard = 3.5 yards (I rounded. It’s fine.)
What you see below is 9 yards worth of fabric. I got 2 adult robes, 2 toddler robes, and 1 baby robe out of that amount.
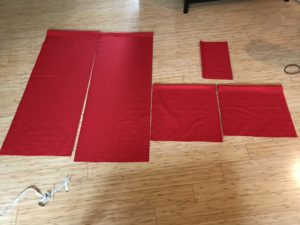
Once you have your fabric, I highly recommend you leave it folded in half. It’s a lot of fabric, and unfolding and re-folding that much fabric is going to get tedious. If you’re an avid sewist, you probably know to pre-wash your fabric and all of that, but we are trying to do this quickly and easily and you will probably never wash this thing, so don’t worry about it. Or do. Maybe you want to avoid the red LITERALLY bleeding like an infertile handmaid onto the clothes you are wearing underneath. I did not have that problem, but you never know. Your costume, your choice.
So, fold your fabric in half lengthwise (or keep it folded) and then fold it in half width-wise. From the bottom cut edge of the fabric to the top folded edge should equal your shoulder-to-ankle measurement (mine was 55 inches). Cut off that extra 1/2 yard and save it for your hood.

Next, most robe tutorials will say you need to lie down and draw from the selvedge edges (the long side that isn’t the fold) to your armpit. I tried that. It didn’t work because how was I going to draw on the fabric while lying down? And yes, I am wearing my Women’s March t-shirt to make my Handmaid’s protest robe. #Resist2017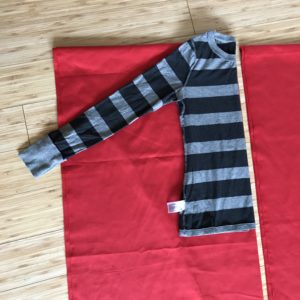
Instead, what I did was I got a long-sleeved shirt from my closet, folded it in half, placed the fold on the fold of the fabric, and drew that way. Go in on a diagonal up to the armpit, then come out again on the way down. Cut this out. Give yourself some space on the sleeves; Handmaids aren’t supposed to be sexy, so this stuff should pretty much hide your shape. Then, on the top, cut a little area out from the fold to just before the armpit for your head. 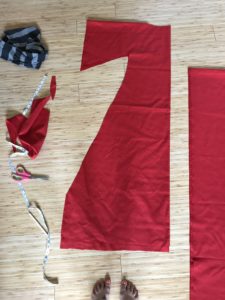
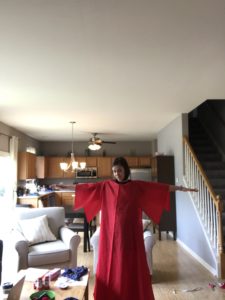
At this point, you may want to try it on to be sure you are doing it right. I did this because, while I didn’t need it to be perfect, I did need it to fit. It fit, but I felt weird about taking the picture with the timer. I think you can probably tell.
Now, the internet is full of advice about this next step. Do you sew the side seams first or cut it open first? I did not know that this was such a fiercely debated topic because I didn’t read much of the internet before I started this as I was trying to get in character and Handmaids are not allowed to read. (Just kidding. I am lazy.) So I cut first. In retrospect, it would have been much easier the other way around. Live and learn.
You’re cutting right up the middle of the front side of this thing. You need it to open, so this is a good place for it to do that. This is also probably a good place for a “may the Lord open” joke so… there you go.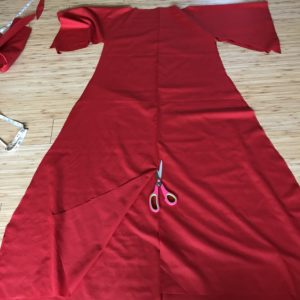
Next, you are going to want to sew this thing together. This is where the serger comes in handy. I serged EVERYTHING. Side seams from bottom all the way to the end of the sleeves. Neck opening. Bottom. Up each side of the opening.) I did not finish any seams (the serger did that for me) or hem anything (the sleeves were on the selvedges so they didn’t need it, and the neck opening/bottom/front opening were serged so I didn’t have to.) If you don’t have a serger… sorry. This is going to take a little longer because you have to hem all the cut edges so the fabric doesn’t fray.
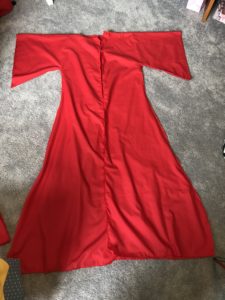
Next, you need a hood. Take your leftover fabric and trace out something that roughly looks like a hood. Do not be a perfectionist about this; you are not even going to wear the hood. It is for visual only, under His eye. Cut two pieces. Serge these together from the top to the bottom. Then, open it up and serge across the bottom. Again, if you don’t have a serger, do your thing to finish those cut edges.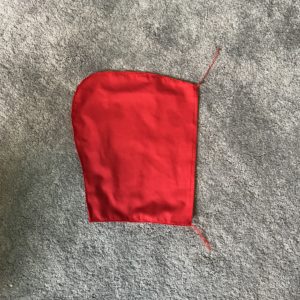
Pin the right side of the open hood to the right side of the back of the robe. Sew it on.
Then, tack a piece of ribbon to each side of your opening. Originally, I had the ribbon in the middle, then I realized I wanted it closed a little more, so I put one ribbon in the middle and one at the bottom of the hood on the other side. Then, I sewed a hook-and-eye to the inside flap so it would stay closed.
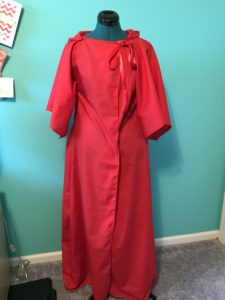
May the Lord open, indeed.
Next, we are on to the hat. Without this hat, you’re just a grown-up Little Red Riding Hood, which is a little weird because it is not Halloween.
This is where you could save a ton of time by just buying a pre-made bonnet and following this video tutorial. (The jig is up. I stole some of her jokes for this post. I am not sorry.) Even Amazon Prime wasn’t fast enough for this turnaround, though, (and those bad boys are like $8/piece which, considering I spent $3 on all of the fabric I needed for 5 bonnets, seemed not very frugal) so I had to make my own. There are a million bonnet tutorials on Pinterest that look a lot better than this, and I probably should have used one of those, but it was getting late, I was tired, so this is what I did.
First, measure your head from under your ear, up over your head, to under your other ear. Add an inch. Then cut a square with that measurement. Mine was 19 inches on each side. Equal sides, equal rights. Be there or be… ok you get it.
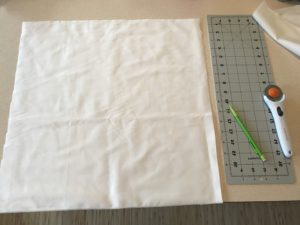
A rotary cutter is awesome for this. Or use scissors. It really doesn’t matter.
Next, fold in each side a quarter inch or so, then again another quarter inch or so. Press. I’m not going to lie – I didn’t measure when I was folding. Just eyeball it.
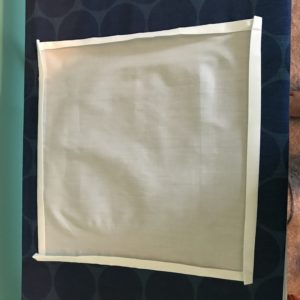
Sew all the sides down, just like you would a hem. You’ve essentially created a large handkercheif. 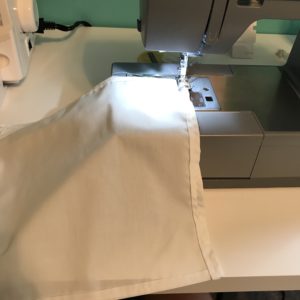
Then, on one side and using your machine’s longest stitch, sew a line of basting stitches. Leave the tails long. You’re going to gather this as much as you can, so take the bobbin thread, hold it, and gather that sucker up. Tie the threads together at the bottom.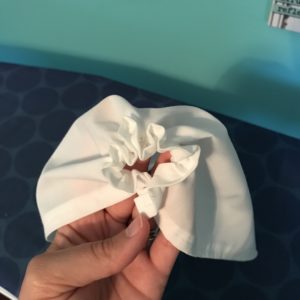
This is the back of your bonnet.
But it looks weird, right? Right. So fold that front edge over about 3-3.5 inches. You can try it on your head to see what you like. Press it.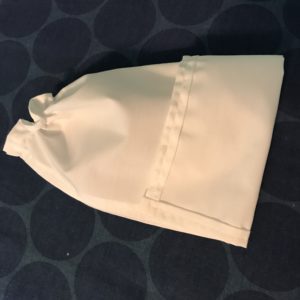
Then, cut two pieces of white ribbon – one for each side. Sandwich one at the corner between the bonnet and the rim and tack it into place. Repeat on the other side.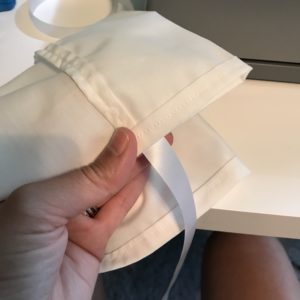
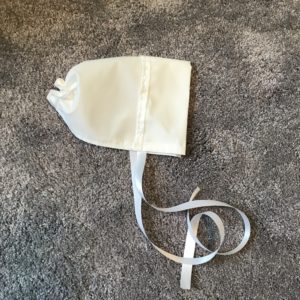
Cute, right? And you can stop there, but I wanted to be authentic. So, take your stiff material – I used the foam board – and draw a shape that looks roughly like this:
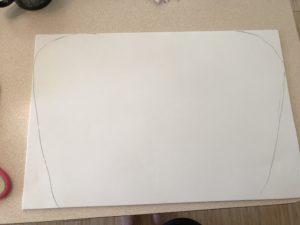
Cut it out. Then, put one side of the Velcro on the bottom (shorter) edge. Lay the other side of the Velcro on top with the sticky side exposed.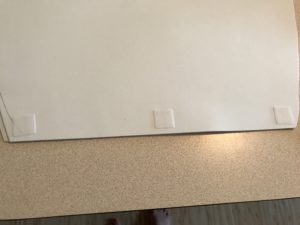
Put your bonnet on, then slap those wings on your head and push down and you are done!
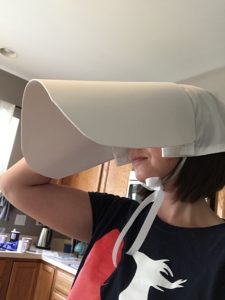
I am fully aware this looks ridiculous. I cut more off of it because, while likely accurate, I also needed to be able to see things for, you know, safety. It’s not an exact science; just do what feels right to you.

Finally, try the toddler robe on your small daughter and feel really good about your handiwork, but also really disturbed by the fact that your 2.5-year-old is dressed as a walking uterus. 


This protest was one of the most powerful and visually striking protests I have ever either witnessed or been a part of. I am so honored that I was able to participate, and so excited that my costumes turned out so well.
NOLITE TE BASTARDES CARBORUNDORUM